In this tutorial, we’re going to learn about models in django.
Models are connected to our database. We can also say that a model contains the fields and behaviors of the data that we want to store into database. Normally each model is connected to a single table of our database.
To understand models and upcoming topics more easily. Let’s create a new project. Where we’ll make a website like this:
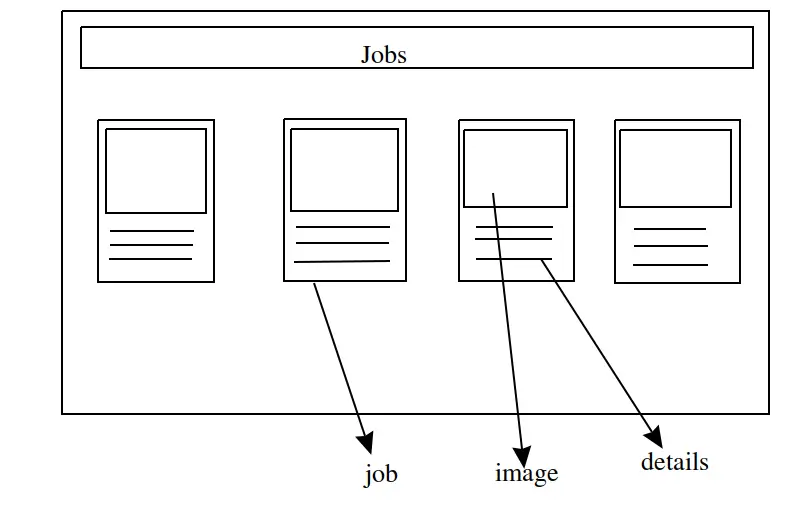
In above picture, we have a web page (homepage) where we’re going to show some jobs that one have done in the past. Normally each of job block will contain a picture and some details. Where the pictures and details will be picked from database, which will make our website dynamic.
To start, create a new project (I’m creating as my_project).
First we’ll create an app for all the jobs so if you want to show that jobs in any other project, then you can move that app into other project (as we’ve seen in previous article) .
Let’s say we have created an app named as jobs by using the command below. Open command prompt and navigate to your project folder, then type:
python manage.py startapp jobs
And don’t forget to add the path of our newly created app in settings.py file of our project folder. (follow the article working with apps to do that).
Note: Use python3 for python 3 in linux
I hope you’ve created project and an app named as jobs.
Here is how our project folder look like.
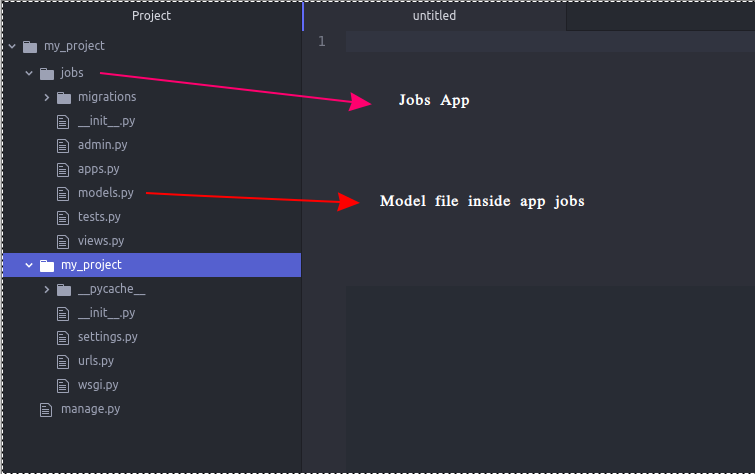
You can see, after creating app we’ve a auto created file named as models.py. Each app will have separate model file. So we can work with our database from that model file.
Create a Model in Django
To create a Model for storing or retrieving information from database, create a new class with any name you want and inherit the class Model. Now open that model file and edit as below:
from django.db import models

# Create your models here.

class Job(models.Model):
    #for image
    image = models.ImageField(upload_to='images/')
    #for details
    summary  = models.CharField(max_length=200)
Here we’re creating a class inside our models.py file. Where we’re using ImageField to store image for a job and CharField to store the summary or details of that particular job. Inside ImageField the attribute upload_to=’images/’ denotes the directory where our images will be stored and the attribute max_length=200 is denoting that we can store maximum 200 inside our CharField named as summary.
Tell Django Project That We’ve Added a New Model
After creating any model we have to change something in our project, so our project will get to know that we have a new model to use.
Before doing this you may have noticed some warnings while running the server, as shown below:
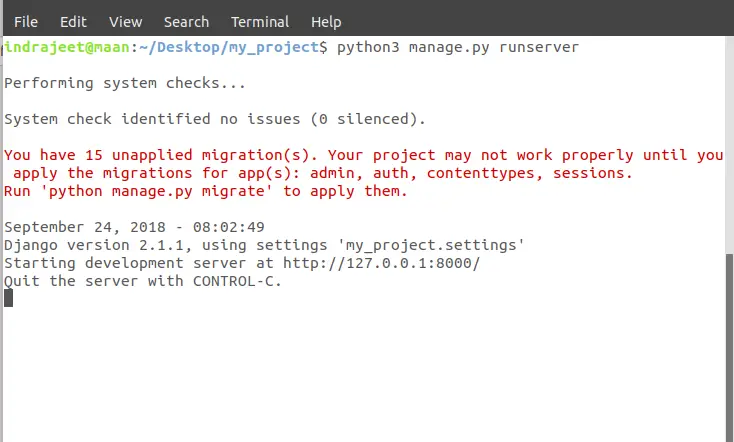
It is showing that we have 15 unapplied migrations for app(s). In warning, it is also showing that how to apply those migrations.
So stop your server and type the command below and restart the server.
python manage.py migrate
And after restart you can see there is now warning now.
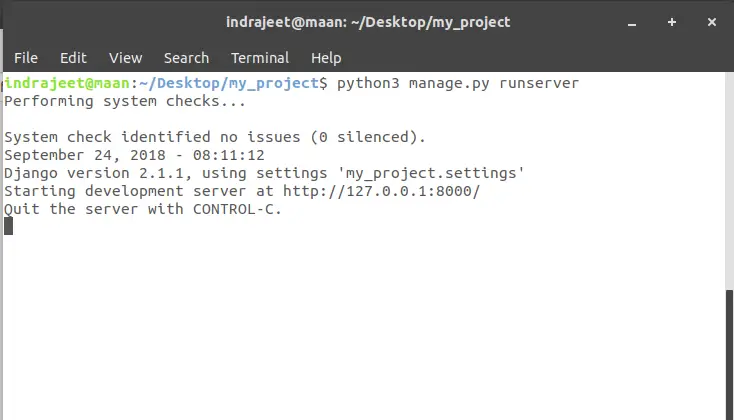
Migration done.
And another thing to do before adding our model is to add something in our settings.py file in our project folder.
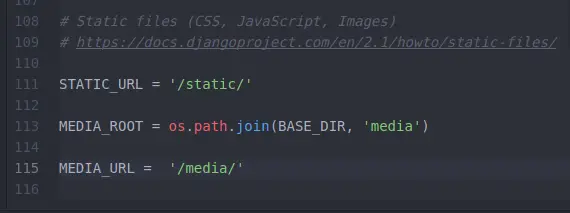
We’ve added MEDIA_ROOT and MEDIA_URL.
Here MEDIA_ROOT is showing that if someone wants to save some sort of information (image, video etc.) it should happen inside the folder media.
And MEDIA_URL showing that if someone is trying to get the access to the image where they are going to get that.
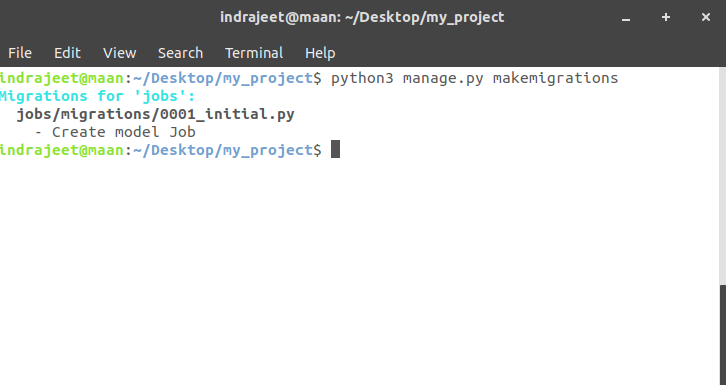
But it still doesn’t have the idea that we have added a new model called Job. To get it known, open terminal and type:
python manage.py makemigrations
Then type another command given below:
python manage.py migrate
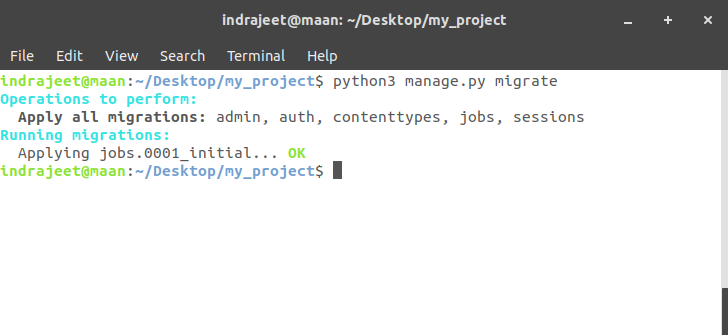
Now we’re upto date, there is nothing to migrate.
That’s all about the model. We’re all set to working with the database. By default sqlite3 database will be used. The advantage of using models is that if we want to change the database later, we can easily change it without changing our models.py file. It will remain the same for all the database.
In next tutorial we’ll learn about how to upload images and summary (text) in database using this module.
The post Django Models appeared first on The Crazy Programmer.
from The Crazy Programmer https://www.thecrazyprogrammer.com/2019/01/django-models.html
Comments
Post a Comment