 I'm a big fan of the SunFounder tech kits (https://www.sunfounder.com), and my kids and I have built several Raspberry Pi projects with their module/sensor kits. This holiday vacation we have two project we're doing, that coincidentally use SunFounder parts. The first is the Model Car Kit that uses a Raspberry Pi to control DC motors AND (love this part) a USB camera. So it's not just a "drive the car around" project, it also can include computer vision. My son wants to teach it to search the house for LEGO bricks and alert an adult so they'll not step on it. We were thinking to have the car call out to Azure Cognitive Services, as their free tier has more than enough power for what we need.
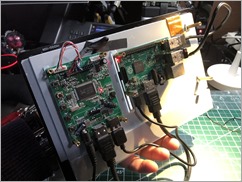
For this afternoon, we are taking a 10.1" Touchscreen display and adding it to a Raspberry Pi. I like this screen because it works on pretty much anything that has HDMI, but it's got mounting holes on the back for any Raspberry Pi or a LattePanda or Beagle Bone. You can also use it for basically anything that can output HDMI, so it can be a small portable monitor/display for Android or iOS. It has 10 finger multitouch which is fab. The instructions aren't linked to from their product page, but I found them on their Wiki.
There are a lot of small LCDs you can get for a Pi project, from little 5" screens (for about $35) all the way up to this 10" one I'm using here. If you're going to mount your project on a wall or 3D print a box, a screen adds a lot. It's also a good way to teach kids about embedded systems. When my 10 year old saw the 5" screen and what it could do, he realized that the thermostat on the wall and/or the microwave ovens were embedded systems. Now he assumes every appliance is powered by a Raspberry Pi!


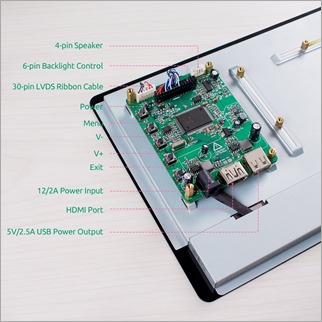
Take a look at the pic at the top right of this post. That's not a Raspberry Pi, that's
the included controller board that interfaces with your tiny computer. It's include with the LCD package. That controller board also has an included power adapter that points out 12V at 1500Ma which allows it to also power the Pi itself. That means you can power the whole thing with a single power adapter.
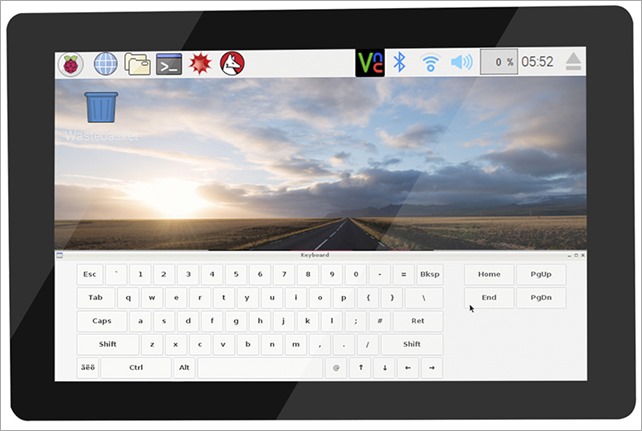
There's also an optional touchscreen "matchbox" keyboard package you can install to get an on-screen visual keyboard. However, when I'm initially setting up a Raspberry Pi or I'm taking a few Pis on the road for demos and working in hotels, I through this little $11 keyboard/mouse combo in my bag. It's great for quick initial setup of a Raspberry Pi that isn't yet on the network.

Once you've installed matchbox-keyboard you'll find it under MainMenu, Accessories, Keyboard. Works great!
* This post includes some referral links to Amazon.com. When you use these links, you not only support my blog, but you send a few cents/dollars my way that I use to pay for hosting and buy more gadgets like these! Thanks! Also, I have no relationship with SunFounder but I really like their stuff. Check out their site.
Sponsor: Scale your Python for big data & big science with Intel® Distribution for Python. Near-native code speed. Use with NumPy, SciPy & scikit-learn. Get it Today!
© 2017 Scott Hanselman. All rights reserved.
from Scott Hanselman's Blog http://feeds.hanselman.com/~/512579050/0/scotthanselman~How-to-set-up-a-Touchscreen-LCD-for-Raspberry-Pi.aspx
Comments
Post a Comment