Setting up a managed container cluster with AKS and Kubernetes in the Azure Cloud running .NET Core in minutes
After building a Raspberry Pi Kubernetes Cluster, I wanted to see how quickly I could get up to speed on Kubernetes in Azure.
- I installed the Azure CLI (Command Line Interface) in a few minutes - works on Windows, Mac or Linux.
-
- I also remembered that I don't really need to install anything locally. I could just use the Azure Cloud Shell directly from within VS Code. I'd get a bash shell, Azure CLI, and automatically logged in without doing anything manual.
- Anyway, while needlessly installing the Azure CLI locally, I read up on the Azure Container Service (AKS) here. There's walkthrough for creating an AKS Cluster here. You can actually run through the whole tutorial in the browser with an in-browser shell.
- After logging in with "az login" I made a new resource group to hold everything with "az group create -l centralus -n aks-hanselman." It's in the centralus and it's named aks-hanselman.
- Then I created a managed container service like this:
C:\Users\scott\Source>az aks create -g aks-hanselman -n hanselkube --generate-ssh-keys
/ Running ... - This runs for a few minutes while creating, then when it's done, I can get ahold of the credentials I need with
C:\Users\scott\Source>az aks get-credentials --resource-group aks-hanselman --name hanselkube
Merged "hanselkube" as current context in C:\Users\scott\.kube\config - I can install Kubenetes CLI "kubectl" easily with "az aks install-cli"
Then list out the nodes that are ready to go!
C:\Users\scott\Source>kubectl get nodes
NAME STATUS ROLES AGE VERSION
aks-nodepool1-13823488-0 Ready agent 1m v1.7.7
aks-nodepool1-13823488-1 Ready agent 1m v1.7.7
aks-nodepool1-13823488-2 Ready agent 1m v1.7.7
A year ago, Glenn Condron and I made a silly web app while recording a Microsoft Virtual Academy. We use it for demos and to show how even old (now over a year) containers can still be easily and reliably deployed. It's up at https://hub.docker.com/r/glennc/fancypants/.
I'll deploy it to my new Kubernetes Cluster up in Azure by making this yaml file:
apiVersion: apps/v1beta1

kind: Deployment

metadata:

  name: fancypants

spec:

  replicas: 1

  template:

    metadata:

      labels:

        app: fancypants

    spec:

      containers:

      - name: fancypants

        image: glennc/fancypants:latest

        ports:

        - containerPort: 80

---

apiVersion: v1

kind: Service

metadata:

  name: fancypants

spec:

  type: LoadBalancer

  ports:

  - port: 80

  selector:

    app: fancypants
I saved it as fancypants.yml, then run kubectl create -f fancypants.yml.
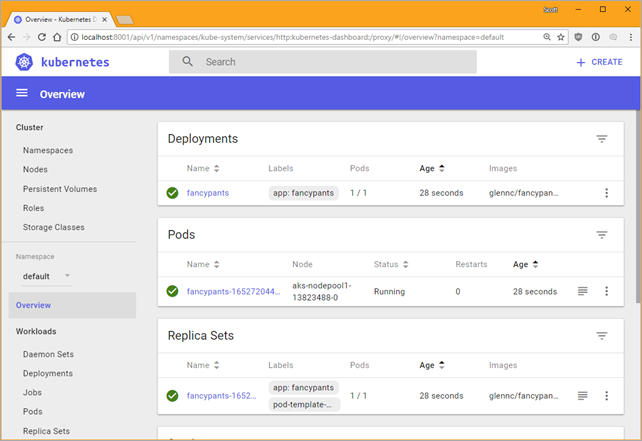
I can run kubectl proxy and then hit http://localhost:8001/api/v1/namespaces/kube-system/services/http:kubernetes-dashboard:/proxy/#!/overview?namespace=default to look at the Kubernetes Dashboard, proxyed locally, but all running in Azure.

When fancypants is created and deployed, then I can find out its external IP with:
C:\Users\scott\Sources>kubectl get service

NAME         TYPE           CLUSTER-IP     EXTERNAL-IP     PORT(S)        AGE

fancypants   LoadBalancer   10.0.116.145   52.165.232.77   80:31040/TCP   7m

kubernetes   ClusterIP      10.0.0.1       <none>          443/TCP        18m
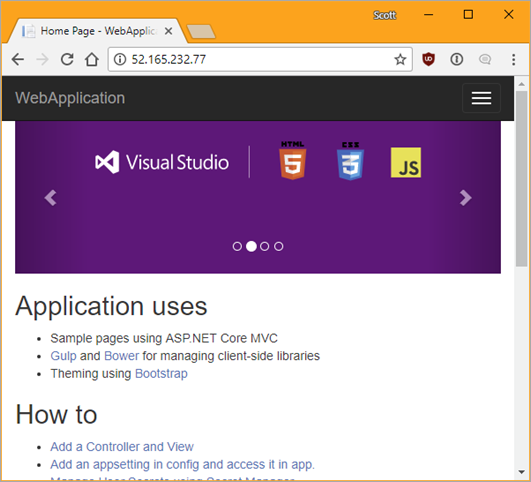
There's my IP, I hit it and boom, I've got fancypants in the managed cloud. I only have to pay for the VMs I'm using, and not for the VM that manages Kubernetes. That means the "kube-system" namespace is free, I pay for other namespaces like my "default" one.

Best part? When I'm done, I can just delete the resource group and take it all away. Per minute billing.
C:\Users\scott\Sources>az group delete -n aks-hanselman --yes
Super fun and just took about 30 min to install, read about, try it out, write this blog post, then delete. Try it yourself!
Sponsor: Check out JetBrains Rider: a new cross-platform .NET IDE. Edit, refactor, test and debug ASP.NET, .NET Framework, .NET Core, Xamarin or Unity applications. Learn more and download a 30-day trial!
© 2017 Scott Hanselman. All rights reserved.
from Scott Hanselman's Blog http://feeds.hanselman.com/~/510411944/0/scotthanselman~Setting-up-a-managed-container-cluster-with-AKS-and-Kubernetes-in-the-Azure-Cloud-running-NET-Core-in-minutes.aspx
Comments
Post a Comment