In working on getting Remote debugging with VS Code on Windows to a Raspberry Pi using .NET Core on ARM in my last post, I was looking for optimizations and realized that I was using plink/putty for my SSH tunnel. Putty is one of those tools that we (as developers) often take for granted, but ideally I could do stuff like this without installing yet another tool. Being able to use out of the box tools has a lot of value.
A friend pointed out this part where I'm using plink.exe to ssh into the remote Linux machine to launch the VS Debugger:
"pipeTransport": {

    "pipeCwd": "${workspaceFolder}",

    "pipeProgram": "${env:ChocolateyInstall}\\bin\\PLINK.EXE",

    "pipeArgs": [

        "-pw",

        "raspberry",

        "root@crowpi.lan"

    ],

    "debuggerPath": "/home/pi/vsdbg/vsdbg"

}
I could use Linux/bash that's built into Windows 10 for years now. As you may know, Windows 10 can run many Linuxes out of the box. If I have a Linux distro configured, I can call Linux commands locally from CMD or PowerShell. For example, here you see I have three Linuxes and one is the default. I can call "wsl" and any command line is passed in.
C:\Users\scott> wslconfig /l

Windows Subsystem for Linux Distributions:

Ubuntu-18.04 (Default)

WLinux

Debian

C:\Users\scott> wsl ls ~/

forablog  forablog.2  forablog.2.save  forablog.pub  myopenaps  notreal  notreal.pub  test.txt
So theoretically I could "wsl ssh" and use that Linux's ssh, but again, requires setup and it's a little silly. Windows 10 now supports OpenSSL already!
Open an admin PowerShell to see if you have it installed. Here I have the client software installed but not the server.
C:\> Get-WindowsCapability -Online | ? Name -like 'OpenSSH*'


Name  : OpenSSH.Client~~~~0.0.1.0

State : Installed


Name  : OpenSSH.Server~~~~0.0.1.0

State : NotPresent
You can then add the client (or server) with this one-time command:
Add-WindowsCapability -Online -Name OpenSSH.Client~~~~0.0.1.0
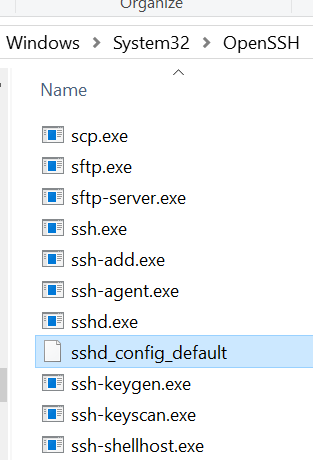
You'll get all the standard OpenSSH stuff that one would want.

Let's say now that I want to be able to ssh (shoosh!) into a remote Linux machine using PGP keys rather than with a password. It's much more convenient and secure. I'll be ssh'ing with my Windows SSH into a remote Linux machine. You can see where ssh is installed:
C:\Users\scott>where ssh

C:\Windows\System32\OpenSSH\ssh.exe
Level set - What are we doing and what are we trying to accomplish?
I want to be able to type "ssh pi@crowpi" from my Windows machine and automatically be logged in.
I will
- Make a key on my Window machine. The FROM. I want to ssh FROM here TO the Linux machine.
- Tell the Linux machine (by transferring it over) about the public piece of my key and add it to a specific user's allowed_keys.
- PROFIT
Here's what I did. Note you can do this is several ways. You can gen the key on the Linux side and scp it over, you can use a custom key and give it a filename, you can use a password as you like. Just get the essence right.
Below, note that when the command line is C:\ I'm on Windows and when it's $ I'm on the remote Linux machine/Raspberry Pi.
- gen the key on Windows with ssh-keygen
- I ssh'ed over to Linux and note I'm prompted for a password, as expected.
- I "ls" to see that I have a .ssh/ folder. Cool. You can see authorized_keys is in there, you may or may no have this file or folder. Make the ~/.ssh folder if you don't.
- Exit out. I'm in Windows now.
- Look closely here. I'm "scott" on Windows so my public key is in c:\users\scott\.ssh\id_rsa.pub. Yours could be in a file you named earlier, be conscious.
-
- I'm type'ing (cat on Linux is type on Windows) that text file out and piping it into SSH where I login that remote machine with the user pi and I then cat (on the Linux side now) and append >> that text to the .ssh/authorized_keys folder. The ~ folder is implied but could be added if you like.
- Now when I ssh pi@crowpi I should NOT be prompted for a password.
Here's the whole thing.
C:\Users\scott\Desktop> ssh-keygen

Generating public/private rsa key pair.

Enter file in which to save the key (C:\Users\scott/.ssh/id_rsa):

Enter passphrase (empty for no passphrase):

Enter same passphrase again:

Your identification has been saved in C:\Users\scott/.ssh/id_rsa.

Your public key has been saved in C:\Users\scott/.ssh/id_rsa.pub.

The key fingerprint is:

SHA256:x2vJHHXwosSSzLHQWziyx4II+scott@IRONHEART

The key's randomart image is:

+---[RSA 2048]----+

|  .   ....  .    |

|..+.  .=+=.  o   |

|   ..            |

+----[SHA256]-----+

C:\Users\scott\Desktop> ssh pi@crowpi

pi@crowpi's password:

Linux crowpi 2018 armv7l


pi@crowpi:~ $ ls .ssh/

authorized_keys  id_rsa  id_rsa.pub  known_hosts

pi@crowpi:~ $ exit

logout

Connection to crowpi closed.

C:\Users\scott\Desktop> type C:\Users\scott\.ssh\id_rsa.pub | ssh pi@crowpi 'cat >> .ssh/authorized_keys'

pi@crowpi's password:

C:\Users\scott\Desktop> ssh pi@crowpi

pi@crowpi: ~ $
Fab. At this point I could go BACK to my Windows' Visual Studio Code launch.json and simplify it to NOT use Plink/Putty and just use ssh and the ssh key management that's included with Windows.
"pipeTransport": {

    "pipeCwd": "${workspaceFolder}",

    "pipeProgram": "ssh",

    "pipeArgs": [

        "pi@crowpi.lan"

    ],

    "debuggerPath": "/home/pi/vsdbg/vsdbg"

}
Cool!
NOTE: In my previous blog post some folks noted I am logging in as "root." That's an artifact of the way that .NET Core is accessing the GPIO pins. That won't be like that forever.
Thoughts? I hope this helps someone.
Sponsor: Your code is bad, but that’s ok thanks to Sentry’s full stack error monitoring that enables you to track and fix application errors in real time. Stop garbage code from becoming garbage fires.
© 2018 Scott Hanselman. All rights reserved.
from Scott Hanselman's Blog http://feeds.hanselman.com/~/593978298/0/scotthanselman~How-to-use-Windows-s-builtin-OpenSSH-to-automatically-SSH-into-a-remote-Linux-machine.aspx
Comments
Post a Comment