Joomla is among the most popular free Content Management Systems (CMS) in the world. It helps in creating and managing dynamic websites with its intuitive management interface. In short, it is a collection of PHP (Hypertext Preprocessor) scripts.
Installing Joomla is not a rocket science if you know how to move ahead step-by-step. However, before you start installing, it is wise to choose web hosting provider carefully. Once you choose the hosting for Joomla, it’s high time to go with installing it on your web hosting account.
So, without further delay, let’s talk about the steps to install Joomla on a web hosting account.
Let’s get started…
How to Install Joomla 3 on Web Hosting
Step 1 – Download the Joomla Installation Pack
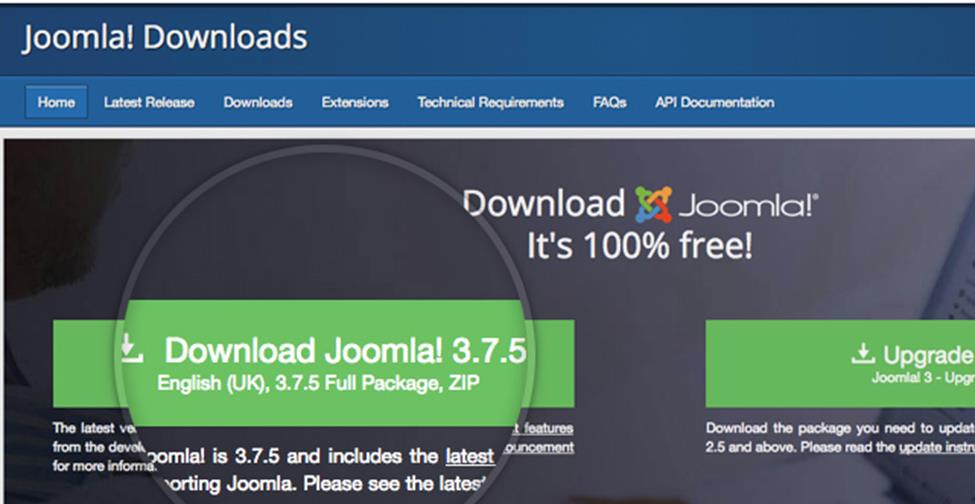
This is the first step to start with the installation process. Make sure to download it from the official site of Joomla because if you download it from other sites, chances are your setup files will be at the risk of malicious code. After clicking on the “Download” icon, the installation package will be moved and saved directly to your hard disk. Save the installation with the name Joomla_xxx package or same like this and save to the new folder so that you will locate it easily when needed.
Step 2 – Upload the Files of Joomla to Your Server
The next step to install Joomla is to upload the withdrawal files and folders to the server. To make it easier, upload the Joomla installation files through FTP. File Transfer Protocol is the convenient yet fast way to transfer files online. Many webmasters use FTP to upload their websites files on their hosting account. To know more about how to upload Joomla files through FTP, checkout the link.
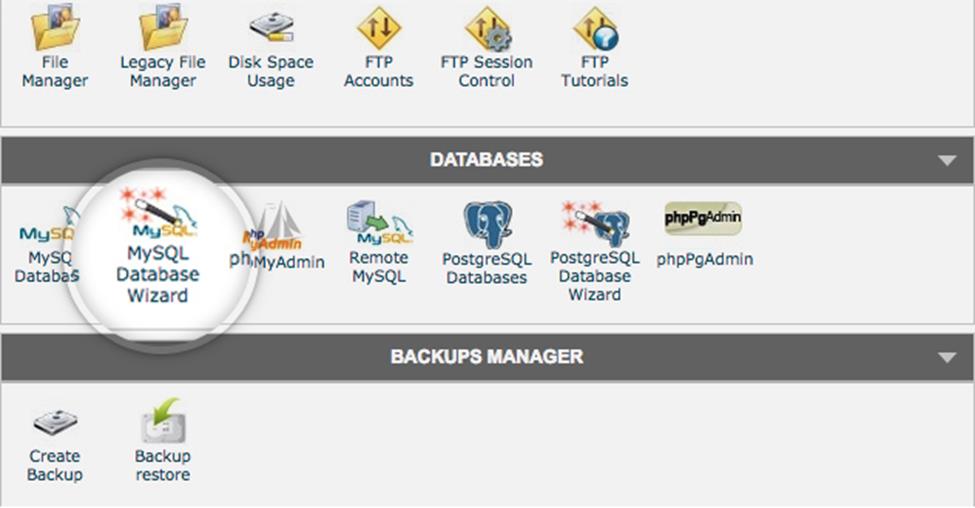
Step 3 – Create a MySQL Database
Moving to the third step to install Joomla, you need to create a MySQL database and assign it to the user with full permissions. You can choose the MySQL database wizard in order to create a user account. To access this tool, access your cPanel and click on the icon of the tool. Create an account by following the steps and you will get a message on successful user account creation.
After creating the MySQL Database and user account, write down the name of the database, username and password. For installation process, you need these details.
Step 4 – Proceed with the Installation Process
Here comes the final step- The Installation Process. To install Joomla 3 on the web hosting account, you need to open your browser and navigate it to the main domain, depending on where you have installed the package. After this, you will be directed to the first screen of the Joomla web installer. Now add your important information like your site name and username and get set go. Have a look at the image below
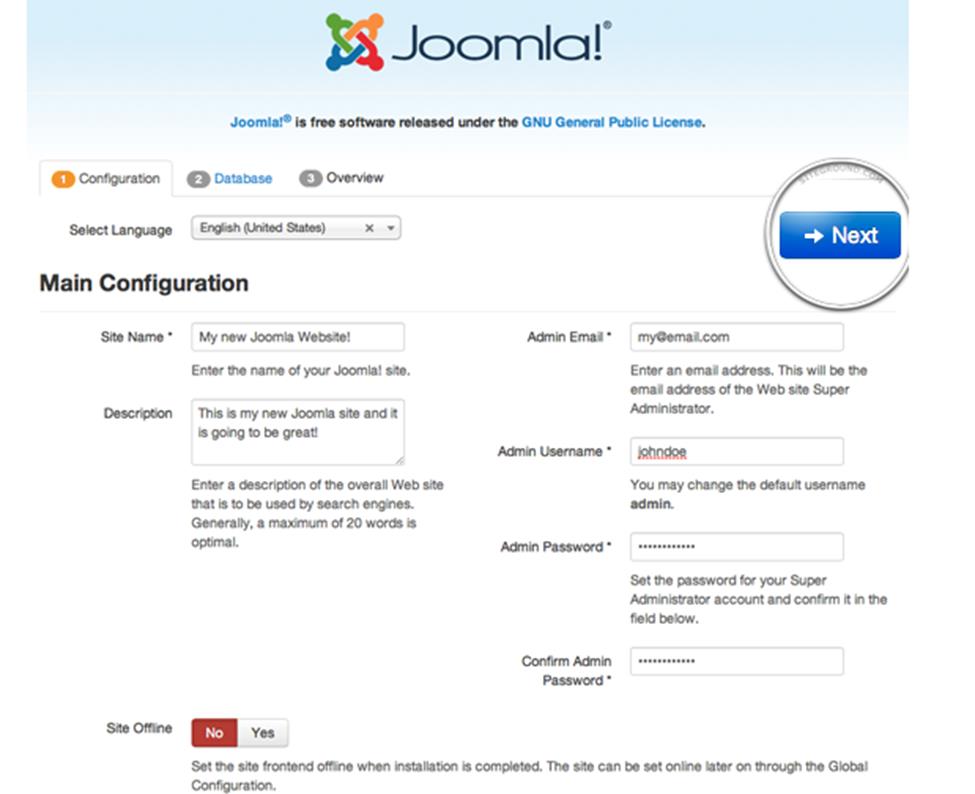
What to Fill in the boxes above?
- Select your language you are comfortable in.
- Enter the site name
- In the description box, write a brief description.
- In the admin email section, enter a valid email address that will be used for system messages and for password recovery.
- In the Admin username box, add your administrative username
- Admin Password – Make sure the password is strong
- In the site offline box choose if you want your site to be offline after installation.
- After filling the required details, click on the Next button and go ahead with the installation.
Step 5:
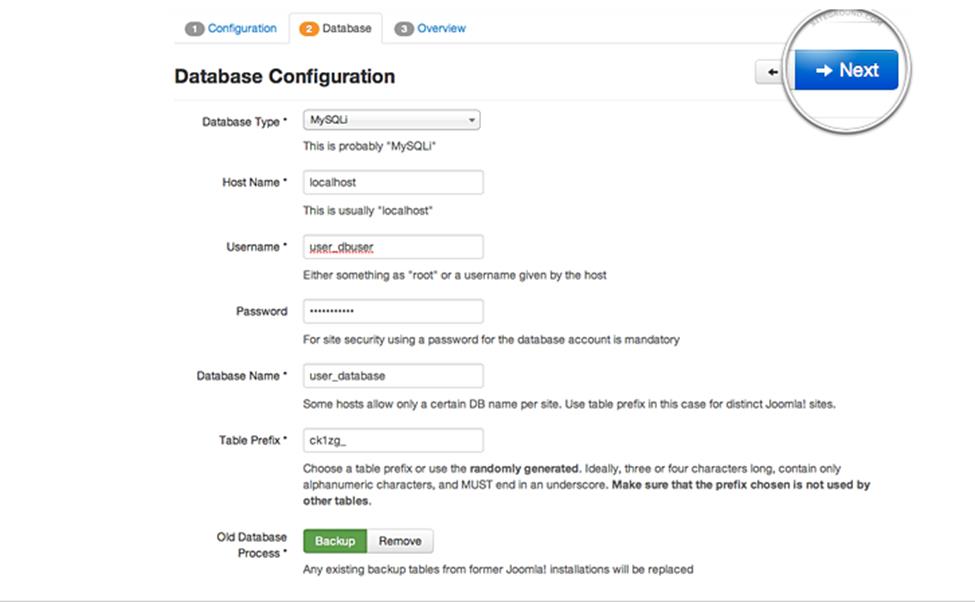
You will be directed to this screen when you click on the next!
What to fill in the boxes above?
- In the Database Type, set it to MySQL which is by default
- In the next box, Host name, leave it default.
- Then in the Username box, enter your username for MySQL database
- In the Password box, fill the strong password
- In the Database box, enter the MySQL database name you want to use
- In the Table Prefix, Joomla will adds to its database tables. This is helpful for those who want to host different Joomla sites on a sole database.
Click on the Next button to move forward and you will be directed to the last page of the final installation process.
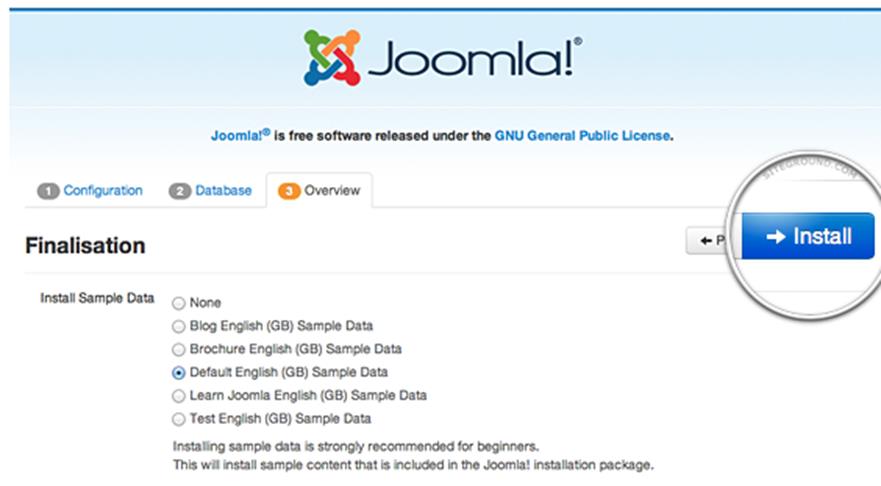
When you move to the second part of the page, you will see pre-installation checks. You will see a green check after each line and moreover, SiteGround servers meet all the requirements of the Joomla.
Lastly, click on the Install button and in a few minutes, you will be directed to the Joomla Web Installer, which is the last screen. Press Remove Installation folder button which is essential for security sake. Remember, you won’t be able to use the site unless you remove this folder. So do it as soon as possible.
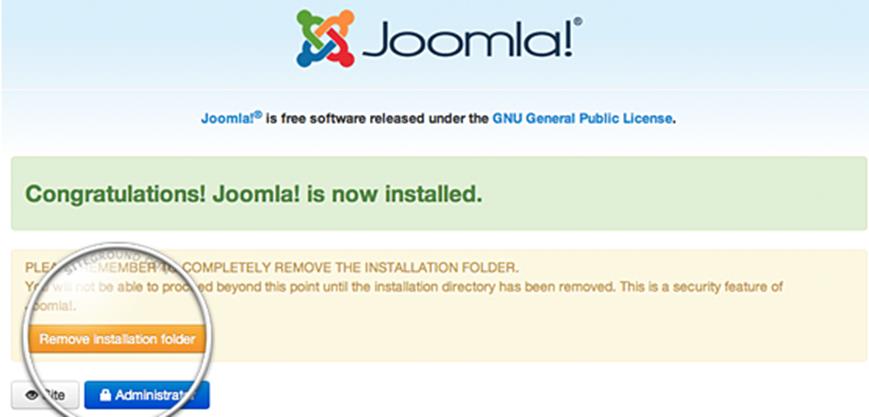
Now after removing the installation folder, you are done with Joomla installation process! Congratulations as now you have a fully access to your Joomla website!
The post How to Install Joomla 3 on Web Hosting – A Complete Guide appeared first on The Crazy Programmer.
from The Crazy Programmer https://www.thecrazyprogrammer.com/2019/02/how-to-install-joomla-3-on-web-hosting.html
Comments
Post a Comment